


As I’ve mentioned, this year I seem to be a little behind on my shopping and organizing and holiday cards. I really am blaming the blog in case anyone cares. But Monday I made a real effort to sit down and tackle my holiday cards and order my supplies so I can make that my big weekend project this weekend, and hopefully get them out next Monday. Well, that’s the goal, anyway. Whether or not that actually happens remains to be seen. I have to believe Martha doesn’t feel this inner panic and anxiety attack creeping up on her like the Grinch attempting to steal Christmas. I mean, she does after all have a whole team of assistants and professional crafters to aid her and probably also help get her holiday cards out to the bazillion people she send them too. I can only hope that someday I will be the lucky recipient of one of those cards bearing Francesca and PawPaw on the cover. Until then, I suppose I’ll have to be satisfied doing all my cards on my own, without a reward in the form of a holiday greeting from my dear friend, Martha. But really, finishing them and sending them out is really enough satisfaction for me, as usually I am quite pleased with what I create and send out, and am happy of the thoughtful message it brings to it’s recipients as well.
I never used to make my own cards. In fact, giving birth to mini #1 must have rea lly made my hormones and brain go awry because it wasn’t until his first Christmas that I decided to make my own cards. As is true with most of my ideas or projects, once I get something into my head I can not let go of it. So that first weekend of December 2002 found me in the midst of assembly line hell, hand painting a little over 100 pieces of card stock (cut by me of course. I mean it would make far too much sense for me to have bought it in the size I needed it, right?) with a light gold foil paint, then printing up our photo and card greeting on vellum (again, which I had to cut myself), hole punching the tops of each layer and paper, and then tying them together with apple green raffia which I went to three stationery stores looking for. A little ridiculous? Yes, I know. One or two people already told me that that Christmas.
But the la st two years I got a little wiser as my Christmas card list has gotten a little longer. I’d chosen to do my photo’s in classic black and white, and chosen black card stock, grabbed my faithful paper cutter to trim it down to my desired size, printed up my greeting on white paper, cut that up as well, glued it inside my card, then glued my picture on top. On the bottom right hand corner, I also dated the photo real inconspicuously with a white gel pen. Now, the reason I like to do the real photo on the card, is because we don’t happen to live near any of our family and friends, so I think it’s a nice way to send my relatives and far away friends pictures of the mini’s they can either frame or tack on the fridge should they so desire. But that’s just me. And as much as I like this classic black and white look I’ve been doing for two years now, I’m tired of it and wanted to bring back a little color into the Monogram holiday card.
Now, let me say, it takes a great deal of restraint for me not to really snaz up our Christmas cards and go to town with them. But because of the volume of cards I send out (160 this year), that sort of forces me to go a more streamlined route. So this year, while I re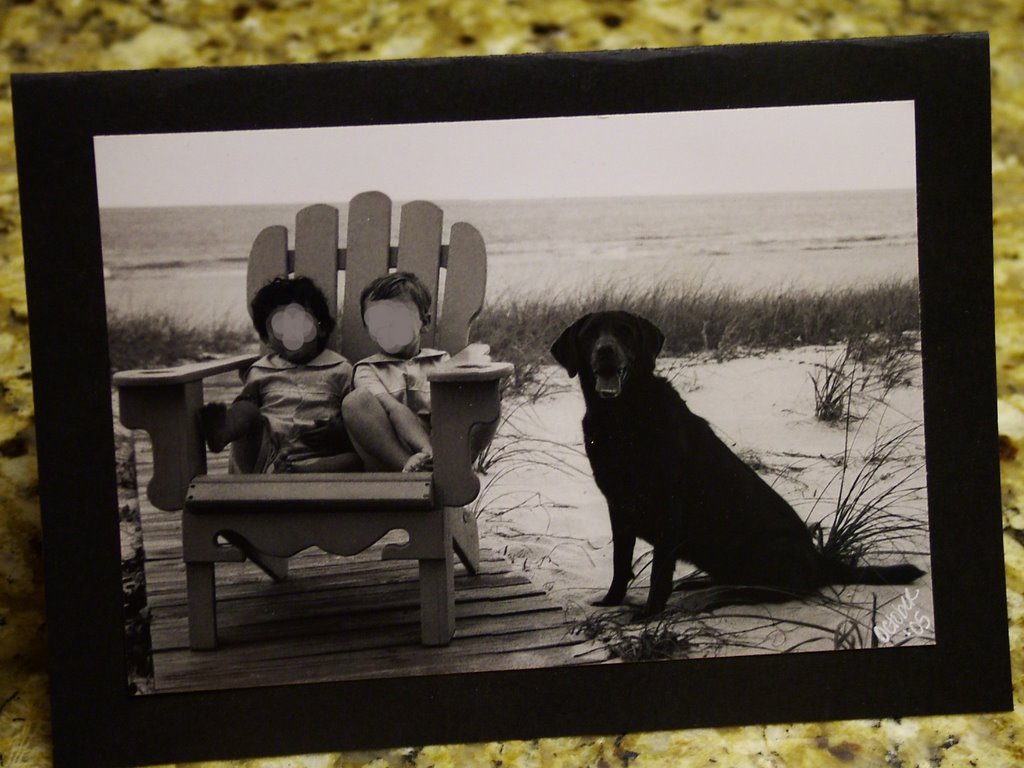 ally had my heart set on doing a scalloped card with ribbon, I opted to once again, do my standard card. Boring, I know. But it’s what I know and I think I might have mentioned once or twice here already that I have a little too much on my plate this year. I did decide though, just to really *spice* things up a bit, to go with the Chartreuse card from Paper-Source. Yes, I know I am really getting jigging with it over here at monogram momma’s. WooHoo! A Chartreuse card! Watch out everybody! Anyway, the reason I love this color this year is well, it’s green and I love green and also it matches so perfectly with the picture of the mini monograms (which will be in color this year for a change), I couldn’t resist. Don’t worry, and don’t be so disappointed. I do have a few little tricks up my sleeve for my card this year that I will share at the “Show me Yours” unveiling, but this is just to give you a little idea.
So where do you go when you are ready to work on your DIY Christmas cards? Well that’s pretty simple. Of course everyone should be well acquainted with Paper Source, who I’ve mentioned on here many a time before. Their selection is second to none and their prices real ly aren’t bad either when you sit down and crunch the numbers. You have so many options to mix and match your card style, edge, (scalloped or ric rac), and color as well as your envelope. And If I didn’t have so many cards to send out, I would have wanted to use one of their great enclosures like this one, and placed my photo on the front, the greeting on the inner left page, and my holiday letter nestled all snug in its pocket on the right-hand side. Want something more colorful with a design perhaps? Then check out their notesets and boxed cards. Either send them as they are, or place your photo front and center of the card, allowing the great design on the front to be the border surrounding your photo. Just make sure you pay attention to the sized card you are ordering. If you order a small correspondence size, then you will need to do a 3x5 photo or even a wallet sized photo for the front.
Similar to what is offered at Paper Source for you DIY Christmas card crafters, is MountainCow. Regular monogram momma visitors might remember when I mentioned MountainCow back in August when I was talking about their monogramming software, PrintingPress Extreme. I’m still pining away for this software and hoping Santa will help it find it’s way down my chimney, but going back to their site, I was really happy to discover they have the “... largest selections of colors and sizes on the Internet for affordable bulk cards, scalloped cards, envelopes and patterned envelope liners, as well as high-end Envelopments(R) metallics, pocket folds and other enclosures to provide do-it-yourselfers with a comprehensive online source for stationery.” Their prices are great, and one thing I really love about their selection is that they show you what card and envelope color combo’s look like together, which is really great. If you don’t find the size you’re looking for, not a problem! They also give you the option to have card stock cut at a specific size for you at no extra cost. If you can dream it or design it, MountainCow can provide it for you so definitely make sure you give them a look. But if you are still looking for more DIY options, then another one stop shop is Gartner Studios. With their simple “upprint” studio, you design it, they do the work and send it on its way to you. They give you lots of ideas and suggestions and offer plenty of paper and envelope options as well. But just keep in mind, that instead of just using regular paper, sometimes it’s nice to use one of the nicer envelopments with pockets! Add a pretty grosgrain or satin ribbon so when your recipients open their holiday card from you, it’s truly more like opening a gift.
If you’re just looking for a great selection and quality of cardstock, then you must go to Marco’s Paper. Okay, so their site really isn’t the easiest (or prettiest) to navigate, but their prices for card stock are phenomenal, they have a great selection of color and thickness and even sheen and finish. If you have any questions you can call or email them and receive a prompt response, and they will also custom cut paper for you. How’s that for service? I have used them many times in the past and if you are looking to DIY your cards on a budget or are looking for some specialty papers, then these are your people. Now, you won’t find anything fancy schmancy with toile patterns or cute black watch plaids, so Marco’s needs to be the place you take your own ideas to. Alyson actually had a great idea! Wanting to reproduce a toile look on the front of her Christmas cards and not finding what she was looking for or not even finding any scrap booking paper she could affix to the front of her cardstock, she is going to get a basic paper doily with all the holes and cutouts, and use it as a stencil over her cardstock, and then just paint over it. I even suggested that if she found a fabric or wallpaper with a great pattern on it that she liked, to cut it out with very fine tip scissors or an exacto knife, and use that as her stencil as well. Here’s hoping it works out Alyson and send pictures to let us know!
One last little tip. Whether you’re looking for convenience or just looking at your budget for your Christmas cards this year, always remember that your local office supply store (Office Max, Staples, Office Depot) surprisingly carries a lot of the supplies you may want to use at really inexpensive prices. For instance, splurge on your pretty cards if you want but then shave a few dollars off your cost by picking up your envelopes in bulk from the office supply store. They even carry plain card stock in different colors, and vellum too. I think we all know how pricey vellum can be, so if you like the look of a vellum overlay but aren’t so fond of the price, then head to Office Max, and pick up an entire notepad full of vellum for a very small price. The only catch is you’ll have to cut it yourself, so if you don’t have a paper cutter, you might want to throw one of those in your cart as well.
Okay, so you’ve got some resources to look into for your fabulous supplies, but what about ideas! I tend to get my inspiration and ideas from other designs. I might like a few things about one or two cards, but combining the elements I like from different cards and creating it myself, give me exactly what I’m looking for. Play around in Word or if you have Adobe Photoshop and you aren’t all thumbs trying to use it like myself, then create your card in there. Saving your creation as a jpeg allows it to be uploaded to one of the many photo processing resources and be printing up on photo quality paper. So I know this isn’t what you want (or expect) to hear, but it really is going to take some looking around on the net and in the store to see what you like and get some ideas. You know I am lot of things, but a mind reader as to what you all are looking for, I am not! One great place to get ideas is over at The Front Door. Somehow I stumbled upon them yesterday and I sure am glad I did! Check out their “craft room” or “ideas” tab and spend some time looking around to get ideas from them. Or, cruise on over to Martha’s site and get some great ideas from her. One year she had an accordion card. The card was a small square and opened like an accordion, and on each little square that you pull out, is a picture of a little boy popping out of a box, so the last photo is of him totally jumping out of the Christmas box, followed by the greeting. It was super cute, but of course, I can not find that issue now to show you. Where are these things when I need them?!
So now that I’ve turned my house upside down looking for this particular Martha holiday issue (empty handed of course), I suppose I need to point you in another direction. And following the signs to Archiver’s will take you into an online store full of anything and everything the scrapbooking DIY-er could ever want. That’s right! Scrapbooking! Scrapbooking supplies offer lots of ebelishments, decorative papers in all shapes, colors, and designs, and will also provide neat paper cutters and die-cut options for you as well. Now truthfully, monogram momma is not a scrapbooker. Lord knows I’ve tried but it just isn’t my thing and I just find the entire process completely overwhelming and I also don’t like to cut up my pictures. But if scrapbooking is your thing, and it very well may be, then you will probably have more scrapbooking-type ideas and resources that I can offer. In that case, by all means, please share it in the comments!
So with all this information in hand, you should be well on your way to creating your own holiday cards this weekend, just as I will be. Have a great weekend and chat with you guys on Monday, that is is I don't have severe carpal tunnel syndrome from all the paper cutting and cards assembling this weekend.
01 December, 2006
Holiday Cards (DIY!)
Posted by Monogram Momma at 2:43 PM
Labels: Christmas, Preppy Projects, Stationery
Subscribe to:
Post Comments (Atom)


5 Comments:
I love the "we, tried!" - classic.
P.S. I must say Preppy Puppy looking downright royal looking in the last card :-)
You are a wizard. Excellent post :D
Preppy puppy IS my regal princess you know!
Whoa, I am feeling positively lazy...I actually had my photo cards made up, but next year I must start earlier and try making my own - much more fun and creative! Great resources!
Post a Comment