


A quick weekend re-cap since I know you’re all just dying to know about my oh so *exciting* life. Friday night pretty much consisted of me sitting in bed (otherwise known as my favorite place on earth) with a stack full of magazines and catalogs, watching Paula Dean’s new live audience show on Food TV (hysterical, btw) while instant messaging Alyson (who was also watching Paula’s new show at the same time) from Mr. Monograms laptop. Very exciting, I know.
Saturday morning was the dreaded soccer that actually went pretty well so I think we are all cautiously optimistic that we will be continuing with soccer. The excitement of soccer was topped off by the boys getting new sneakers (BTW, can someone please tell me why I continue to pay as much for my children’s sneakers as I do for my own when they’re only going to fit for oh, I don’t know, about a week?), going out to lunch, and then off to start the buying for my outdoor decorating. This would be the part that Mr. Monogram actually loathes. But as in all fairy tales, you know there was a happy ending and this one too, just happened to include a pumpkin. A Great.Big.Pumpkin.
And here she is. All 110 lbs of beauty, now resting peacefully, welcoming visitors to my front door. Of course, I must shamefully admit, she wasn’t my first choice. The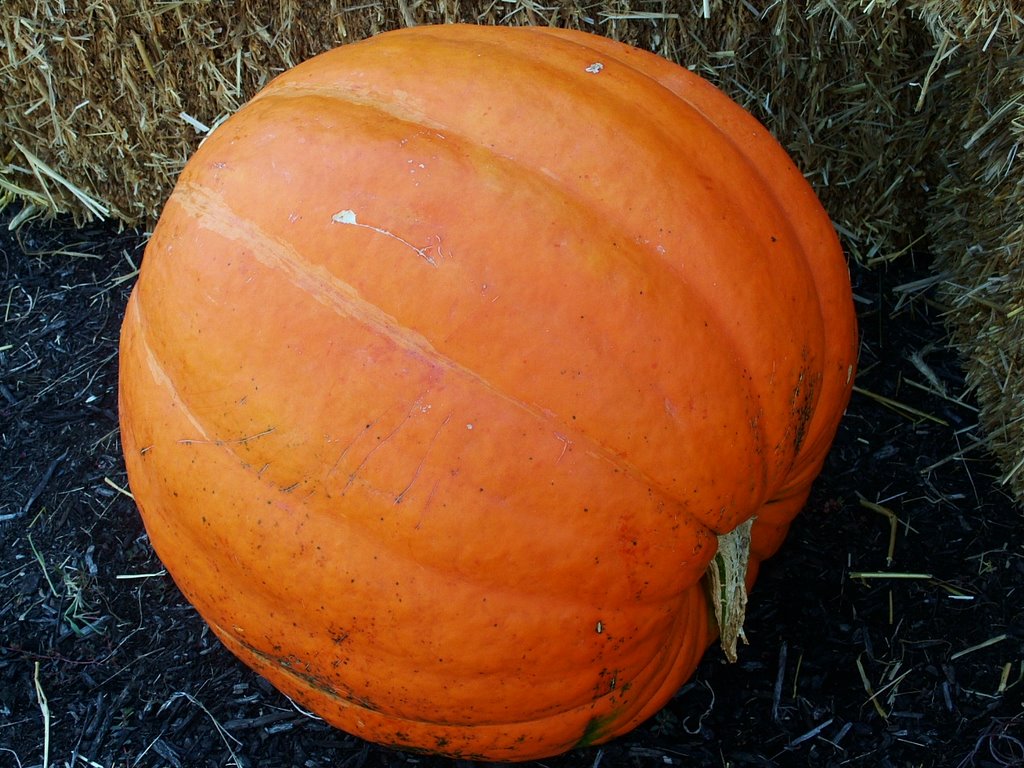 first choice was probably closer to 98 pounds and after I had Mr. Monogram carry and heave first choice #1 into the back of his car, it was then that we spotted this beauty, and I’m sure you know what happened next. Yep. The removal of the 98 pounder out of the car and back to her perch of hay and then the back-wrenching lift of my 110 pound girl and his subsequent escort of her to the now empty spot in the back of the car (there were some four letter words and inappropriate grunting made by Mr. Monogram in here too, all the while the mini monograms are buckled in their car seats watching this crazy Chinese fire drill of ours with the pumpkins cheering “Yeah Daddy! Faster daddy!” and monogram momma chasing behind him hollering “Be careful! Slow down! If you trip and break that pumpkin I swear…!” but I will spare you all that visual). So like I promised last week, my weekend was full of purchasing (everything in sight) and planting (fall mums), painting (must keep the mailbox looking fresh you know) and pumpkins (enough said). And now I’m going to share it all with you, so buckle your seatbelts as you know I warned you it was going to be a fast fall ride.
Let me start by saying this is the third house we’ve owned. Each house has been different, as has my outdoor decorating for the seasons. And since this is now our third Fall in this house, I’ve pretty much done the same thing every fall. Why, you ask? Quite simply, monogram momma does not like change, and honestly, why mess with a good thing? So I pretty much use the same decorating foundation or idea each Fall, but just build on it a little differently. It actually takes me a couple weeks as I like to lay my foundation then build a little bit every couple of days. That way I can live with what I’ve done and really decide what and where I want to add to my landscape decorating. And where Fall decorating is concerned, you can never have enough pumpkins, or hay bales, or corn stalks or freakishly large squash and gourds, all of different types, shapes, and colors, right? Of course I’m right.
As I mentioned, I really just worked on laying my Fall decorating foundation this weekend, so I will not show you the whole big picture as it’s not finished yet. And you know me, I am not about to show you an unfinished project! But don’t worry, we’ll get to that soon enough. Instead, I will walk you through a few of my smaller pumpkin decorating projects that help to make up my finished project. And one of the things I love to do is to use my pumpkins not only for decoration lying around or cut out, but as a planter. Lucky for you, Martha actually shows this in her current 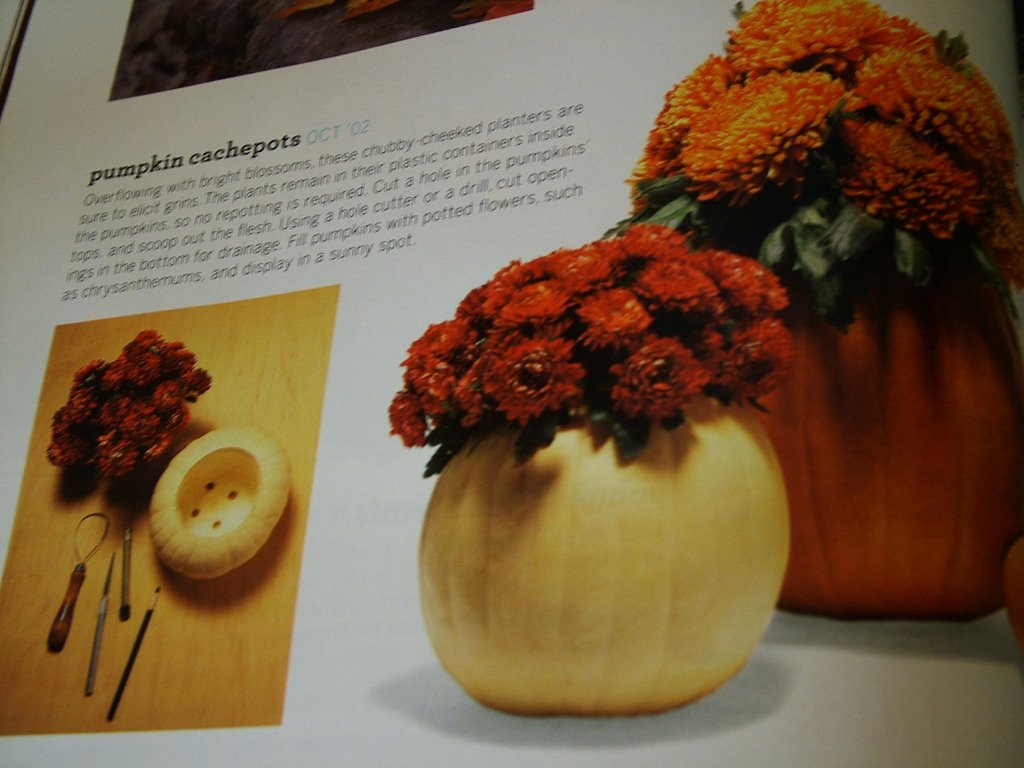 magazine (of course she does because as I’ve mentioned before, we are clearly related in some way and function off the same wavelength) so if you happen to have her magazine, you can find instructions there, or I will tell you how I have always done it. Now, to make a pumpkin planter, cut off the top and hollow it out as you would if you were carving your pumpkin, only make the top opening larger (remember to save those seeds!). Once it’s all cleaned out, turn your pumpkin over and cut a few small drainage holes in the bottom. The beauty of this is there is no need to re-pot the mums. That means you can spare your manicure the mess and just take your hardy mum in its tacky plastic container and slip it inside the hollowed out pumpkin, with the pumpkin completely hiding the plastic container. Use different sizes of mums and also different sizes and types of pumpkins to create a nice uneven stair-step look with multiple levels and layers of your decorating. As an alternate, there are so many different types and shapes of squash out that that would make fabulous planters as well if you lay them on their side lengthways and make an oblong cut in the top and scoop out the insides that way. Once you’ve done that, you can get perhaps 2 smaller mums and a decorative khale in there so your elongated squash looks somewhat like a festive little window box. Don’t you just love it?!
Now, let’s meander down my front walkway towards my front door and have a look at my large pla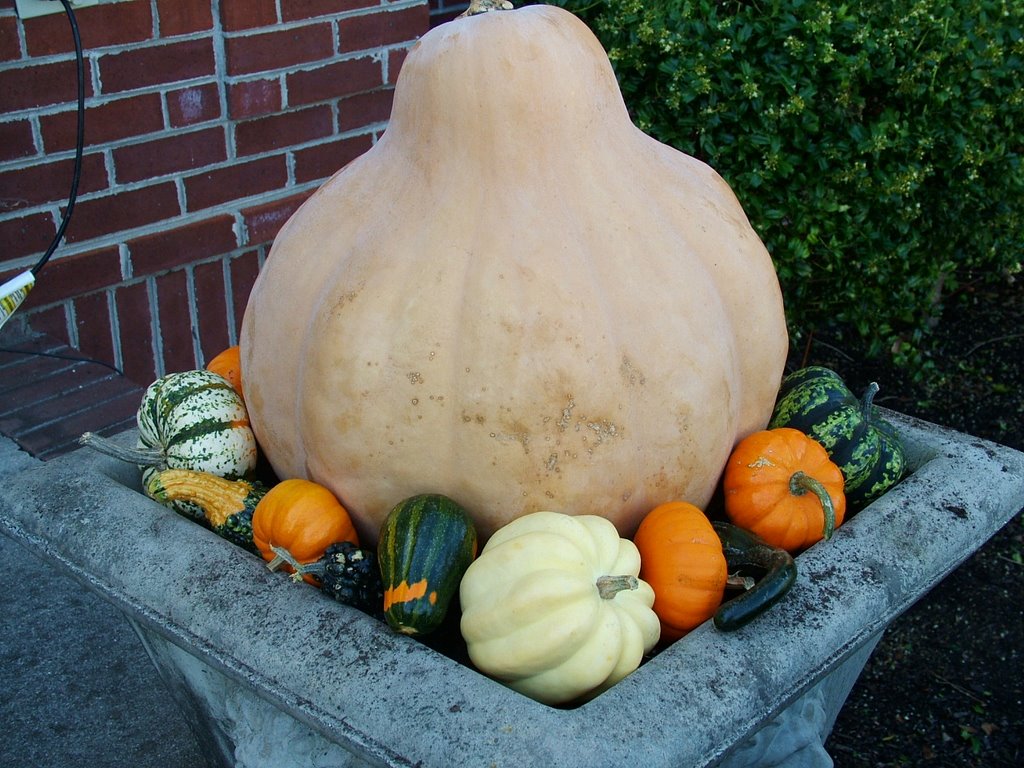 nters that flank each side of my front door. Last week I showed you how you can put your faux topiary in your large planters, but if you didn’t like that idea and you’re staring at your empty planters after pulling out all your dead summer stuff, still not knowing what to do, then pile it with pumpkins and squash and gourds of all colors and sizes to add interest to your front stoop (as you can see here). What I opted to do was to put a big field pumpkin i
 n the center of my planters, then surround it with smaller gourds and pumpkins and white acorn squash. I love the texture on these little gems and they are so appealing to the eye. Now, later this week I will be painting my initial on each of the large pumpkins, and a few spooky eyes on a few smaller surrounding ones. They will stay like this for a couple more weeks, and closer Halloween I will take them out, carve them, and place stands of lights inside for maximum glow. I don’t want to carve them too soon because otherwise they won’t last until Halloween and what’s the fun in that?
But wait! We can’t forget the mailbox! This time of year the mail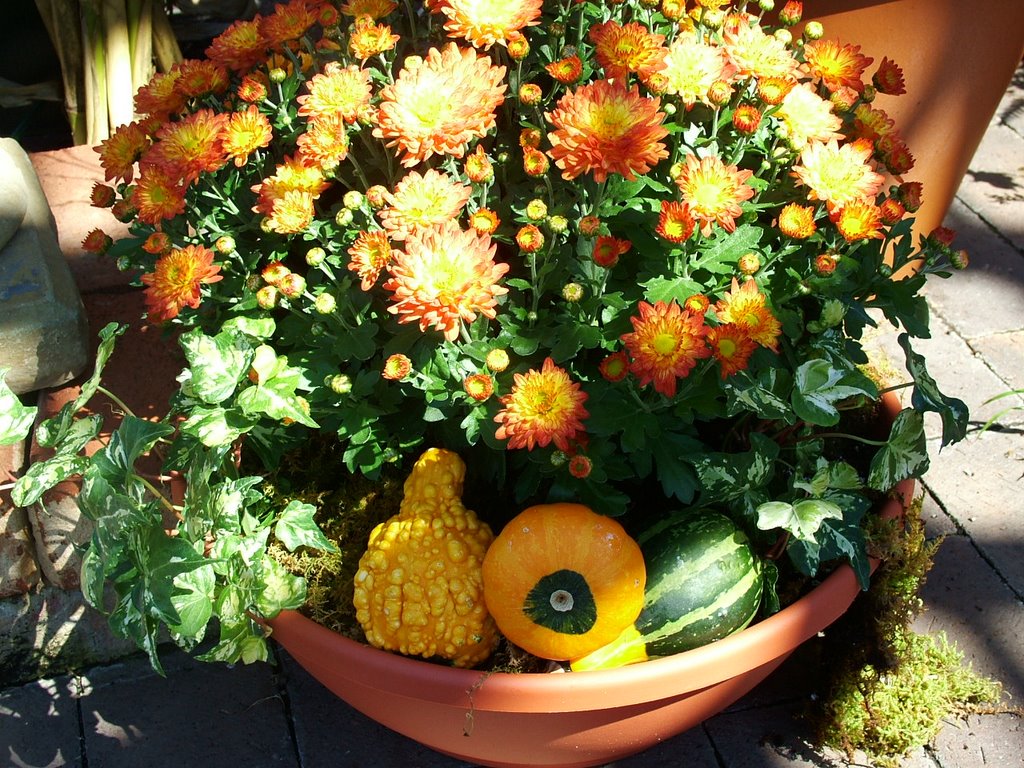 box is looking, well, rather drab to be honest. But that doesn’t mean you should ignore it. Put on a fresh coat of paint, trim and tie up your vines if you happen to have a climber latching on as I do, and again, just put some small colorful pumpkins and gourds around the base of your mailbox to add some additional color. Why not even temporarily relocate a few pots from the back yard and if you still have with a few living bits of foliage left, leave them there and add in a few small little gourds. Look at this picture and it’s like a little unexpected surprise is waiting for you in the pot of flowers; and really, who doesn’t love a surprise?!
Now, a fe w other ideas to include in your fall decorating plan of action, is to use wagons or wheel barrows as well. An iron wheel barrow or old Radio Flyer red wagon stuffed with hay bales and pumpkins and gourdes, flaked by decorative khale and lettuce's and mums will really make for an attractive Fall focal point for your house. I snapped this picture at my gargden center on Saturday, and while I don't expect any of you to have a vacant old wooden buggy just hanging around, it just shows you what you can do with something similiar but smaller. What about an old wicker chair? Or rocking chair? There's no reason you can't incorporate these things into your Fall landscape to help make it a "good thing."
So the point is, that you can use your real pumpkins for whatever you want in your outdoor Fall decorating. And no, I'm sure you noticed I haven't even touched on the subject of carving pumpkins and all the designs and ideas you can do with your nifty knife and a dremel, but sit tight and that will come in due time. As I mentioned, I've got several different installment of pumpkin tips and ideas coming your way. Now, Good luck in finding your own Great Pumpkin and finding it's own spot of glory in your yard.
01 October, 2006
The Great Pumpkin
Posted by Monogram Momma at 8:25 PM
Labels: Halloween, Home Decor, Preppy Projects
Subscribe to:
Post Comments (Atom)


5 Comments:
Adorable decorations! Love the description of Mr. M struggling with the Great Pumpkin--that sounds like something that would happen at our house. :)
Hi! New to your site-just jumped over from Melissa Morris -May December blog. Your site is fantastic! You are my fall decorating guru .
This stuff looks fabulous! I love your fall decorations. Thanks for all the great ideas.
Looks like you found the perfect pumpkin! Don't you just love the fall?
I have pumpkin-envy. None of my wild pumpkins seem to be very large :) Also, I was bummed to read that this wild pumpkins do not make for great cooking (too stringy) - bummer! I guess I will have to get a bit creative in decorating the yard.
Post a Comment